Thursday, June 20, 2013

EASY TO USE RIBBON SHREDDER

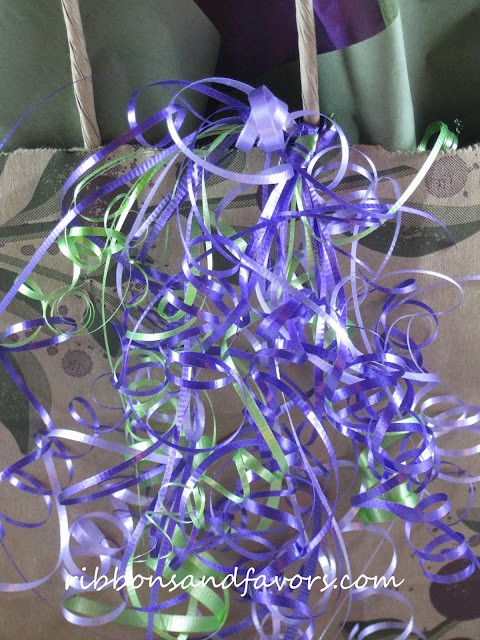
Ribbon Shredders (which, by the way, are one of our favorite tools next to a nice sharp pair of scissors) take economy ribbons to a designer level. This tool is sometimes referred to as a "ribbon slitter" but no matter the name, they are so easy to use on non-woven poly ribbons such as curling ribbon and floral poly ribbon. Such a great look with just a squeeze!


STEP 1
Slip ribbon between the teeth of the shredder. Pinch the teeth together so they bite into the top and bottom of the ribbon pieces - maintain the pressure on the shredder with your thumb and finger, then slide it firmly down the ribbon. Easy-peasy.


STEP 2
Slide the blade of your scissors down the shreds of ribbon to create a fine jumble of ribbon tendrils.


TIPS: You don't have to shred one strand of ribbon at a time. For the shredded ribbon accent on our gift bag we placed about 5 strands of 3/16" curling ribbon between the teeth and shredded them all at one time. So shredding your ribbons actually goes very quickly when using a Ribbon Shredder.  The more ribbons you use the fuller your bow.
 
Ribbons and Favors Shopping List:
Ribbon Shredder, 3/16" Curling Ribbon, Shopping Style Gift Bag


Thursday, June 6, 2013

SMALL TISSUE PAPER PUNCHED FLOWERS


Did your Mom or Grandma save wrapping paper? Mine did. She carefully flattened out the fancy wrapping paper that came off gifts, requesting that we try not to tear the paper, which we would have much preferred to do in our hurry to the good part, but instead she wanted us to carefully open it at the seams and lay the paper aside.  She would then flatten out the fancy wrap, carefully fold it and save it to be re-used on a smaller sized gift.  
 
We may laugh at this old fashioned frugality, but guess what, the modern day guru's of recycling are touting this as a great way to re-use, re-purpose, recycle, be green and eco-friendly.  Over 4 million tons of gift wrap and gift bags reach the nations landfills each year! That's a lot of paper that we could have some fun with. It is also a good reason to purchase good quality gift bags that can stand up to many uses.
 
So here is a quick and easy project to make use of used tissue papers, gift wrap, newspaper and even book or magazine pages.
 
SUPPLIES
Paper
Punches
Brass Head Fasteners (1/2" long)
 
We have used pre-used tissue paper for our project, a 2" scalloped round punch, a 2-3/8" blossom punch and plain brass fasteners from our local office supply store.  Tools: awl (for piercing the papers)


STEP 1
Punch design from your paper.  You can use as many layers of paper as you wish, we typically use at least 6, often more for a fuller flower.  You can combine colors, use all one color or even combine prints and weights of papers. We have punched 4 scallop rounds (top layers) and 3 blossom (bottom layers).

STEP 2
Stack punched designs on top of each other and pierce the center of the stack with your awl, or the sharp end of a geometry compass works also.  Remove stack from piercing tool.

     
STEP 3
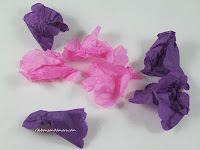
Crumple up the punched layers. Then gently uncrumple and slip the fastener through the center of the pierced layers.  Pry open the tines on the back of fasteners and press flat against the back of the flower pieces. Create your 3D flower by re-crumpling and arranging the layers to cover the fastener (if desired) and fanning them out all the way to the bottom layer.  


Finished flower


TIPS: When using pre-used papers for this project the punched edges are often not as clean as when you use new papers.  For this application we don't mind that edges are often not as perfect, but if you need a crisp outer edge we suggest using new paper products.
 
You can use fancy paper crafting brads in place of the plain brass fasteners and leave the center a little more open so it can be seen.
 

Enjoy ~ Sandra
 

Sunday, May 19, 2013

DAZZLING HEART FAVOR BOX

White Gloss Favor Box 3"x3"x2"


Oh so pretty...yet...oh so simple! I must tell you that this favor packaging project was motivated by comments in a bridal forum. The professionals were saying that there should be no DIY's at weddings...yikes...I disagree and told them so. Their thoughts were that DIY elements at a wedding never turn out well and cheapen the feel of the event.

The challenge was now on to create a boutique style favor that those with basic crafting skills could make themselves. This turned out far-and-away better than any pre-mades, kits and even many customs that I have seen, and the beautiful part is the favor box is simple to make with minimal supplies needed. Fill them with whatever YOU fancy; a cookie, truffles, candy, gift card, etc.

Supplies


3"x 3"x 2" White Kraft Favor
Box                                                        
2 yards 7/8" wide Pink Organza Ribbon
White Pipe Cleaner
Sparkling Pink Card Stock
Heart Die (made from AccuCut Heart #6-small die)

Tools: scissors


We filled our favor box with pink gourmet jelly beans. As you can see we have used a white paper cupcake liner for our food safe barrier. The cupcake liner is resting on a little nest of white crinkle cut shred to bring it closer to the top of the box.


       Cut 1 yard of 7/8" organza ribbon and wrap around the favor box as pictured. Tie in a knot.


Make 3 loops of your 7/8" ribbon about 3" wide. Fold pipe cleaner around center of loop then twist to secure (as pictured above).  Glue ribbon bow to top of favor box. Glue point of die cut heard to the corner of the top of the box. Then glue the top of the heart to center of ribbon bow (as pictured below). This will give the heart
a nice lift.
Trim up the ends of the ribbon and you are done! 


Tuesday, March 26, 2013

WEDDING COLORS 2013

Here we are... Spring 2013 has arrived and around here the weather is very temperamental. Although, our Spring weather is changeable the color palette for 2013 wedding season is set! Take a peek and see what you love.


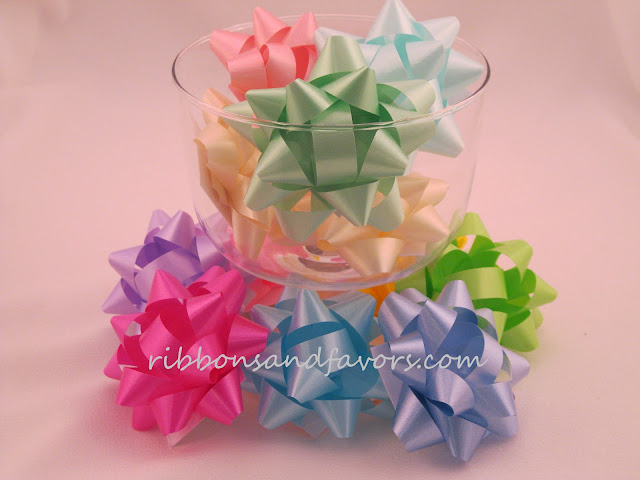
Star Bows

Pantone has published their 2013 fashion colors and what a lovely line up it is. Along with the purple, blues, greens, yellows, pinks, reds and oranges the colors black, pewter gray and silver are coming in as strong accent choices.  As always, classic white is the base color of popular choice.


With Pantone's guide in mind we recommend Ribbons and Favors tissue papers in oxford blue, turquoise, sapphire blue, soft lavender, scarlet red, red, dandelion yellow, light yellow, leaf green, pistachio, Caribbean blue, teal green, tangerine, blush pink, gray, black, metallic silver and white.


We recommend Ribbons and Favors matte and pearl raffia in daffodil yellow, celadon green, pink, lavender, emerald green, red, burgundy, black, charcoal gray and white.

Pearl Raffia in Celadon Green, Daffodil Yellow, Pink and Lavender
 
 
For information on Ribbons and Favors color matching services visit our page at Free Custom Color Matching ribbonsandfavors.com


Saturday, February 23, 2013

Food Safe Barriers For Pretty Favor Boxes.


Of course, our favorite product to use for creating a food safe barrier is Ribbons and Favors own cello products.  Cellophane comes in sheets, rolls and bags.  But, there are times when we use other food safe barriers.  If you take a peek in our supply cupboards you will also find wax paper, aluminum foil, cupcake liners, candy liners, disposable nut cups, parchment, plastic wrap, butcher paper, freezer paper and even plastic bags.


We do love to use a pretty cupcake liner or muffin liner inside a cute favor box!  Must admit though I have a teeny bit of an obsession with fancy cupcake liners and wraps, but that's for another time.

Food safety techniques can be used when putting ribbon around cakes by applying a band of wax paper the same width as the ribbon around the cake first, then place the finishing ribbon right over top of your wax paper strip. Food safe papers can be cut with fancy scissors to create a decorative edge. It really is simple to keep unwrapped food items safe and still have endless packaging options.

If cello isn't going to work, look around your kitchen or in the kitchen isles of your local grocery store, you will find a number of  food safe barriers.  Then the sky's the limit, so to speak.  Slip a sumptuous brownie into a gourmet box lined with a food safe barrier.  Tie it up with a pretty ribbon.  Ahhhh... safety and beauty...a perfect union!


Monday, February 18, 2013

BALLOON DECORATIONS - Bouquets

Simple Balloon Bouquets Can Look Stunning!


Balloons easily transform a room. Balloon table arrangements add color, height and dimension. Room arrangements can be created by subtle placement of balloon walls and bouquets at the entrance, around the dance floor, or dotted around the room. They can give the appearance of  a lower more intimate feeling ceiling  height, or a pop of color. Balloons are a low cost decorating addition that call out, the celebration is on!

Helium Filled Balloons
Helium, of course, makes the balloons rise. Anytime you are looking for the balloon to hang suspended in air without the assistance of nets, poles or wire you would use helium. Helium filled balloons make a beautiful "dropped" ceiling, a fun table center that adds height to your space and quick and simple balloon arches.

Good quality balloons are a must when using helium if any kind of float time is desired. Latex is widely used but varies in quality. The thick latex balloons needed for helium are often very dark in color when not inflated. Use non-metallic ribbon with latex balloons as metallic ribbons can cut the latex creating a leak. 

Note: Float time of helium filled balloons are affected by temperature and sunlight. If using balloons outside inflate indoors, keep away from sunlight and don't take outside until just before your event start time. Average float time for a helium quality latex balloon is 12 to 16 hours at room temperature and out of sunlight. Float time for Mylar (foil) balloons at room temperature is 2 to 14 days.

Helium tanks can often be rented from party stores or welding supply stores. If you are doing a lot of balloons these are the best sources. If you are just doing a few balloons checkout purchasing the small party size disposable helium tanks from local stores that sell party supplies. This can be a good alternative if you prefer to fill your balloons on site or you can also have you local party store fill them for you to transport to a destination.

Air Filled Balloons
Air filled balloons are becoming popular because of the high cost of helium. If using air the balloon needs assistance with some kind of structure or wires to create balloon sculptures or to appear suspended in air. Air filled balloons can be used as pole toppers, columns, arches, table centers as well as floor and ceiling coverings.

Prepare Ahead
When decorating with balloons it a good idea to prepare as much as you can before the day of the event. Ensure you have enough balloons (include extra for breakage), correct weights, supports, ceiling hooks, monofilament (fishing line), lots of ribbon and any tools you may need. Don't forget a tape measure and scissors!

You can pre-cut the ribbon for each arrangement and even tie them to the weights so on the day of the event all you have to do is inflate the balloons, knot, tie them to the ribbon and curl the loose end. This is job that more hands are better on the day of!

Choosing Colors
Balloons come in a large array of colors which is a huge plus in event décor. All one color looks great, but the pro's recommend using mixes of colors such as all primary colors, all pastels, different shades of one color, team colors, corporate colors, brand colors. A mix of 2 to 3 different colors is the standard.

Which type of balloon should I use for my bouquet?
There are two main types of balloons available: Latex and Mylar (often called Foil)

Mylar (Foil) Balloons
Mylar balloons can be inflated with helium and are self sealing which means you don’t need to knot them. They also have a valve which means that they should stop accepting helium when they are full - just inflate gently with helium until the valve automatically switches off and tie to a ribbon. This will only work if you fill the balloons slowly and it is possible to burst the balloon if you overfill it. Foil balloons should be filled so that the shape of the balloon is apparent BUT there is still some give in the side of the balloon when pressed. If the balloon is filled so that it is tight a seam is likely to burst and the balloon will either pop or slowly leak out helium. Be careful and cautious’when you fill them. Foil balloons usually last for 2-3 days.

Foil balloons should not be released outside as they are not biodegradable.

Character balloons make an instant theme or send a message. Shaped balloons add a nice dimension to a cluster and can fit the theme of your party or event. The foil adds some reflected light to your arrangements.

Latex Balloons
Latex balloons can be filled with air or helium depending on the quality of the balloon. You will often see large quantities of balloons for sale at very low prices but they may not be good enough quality to take helium or they may take the helium but deflate after a very short time. Helium quality latex balloons are thicker than standard balloons and often appear much darker in colour when un-inflated than when inflated.
Decorator quality latex balloons last for 12-16 hours when filled with helium and so DON’T do them the day before. On the day keep the room aired but keep the filled balloons out of direct sunlight until you need them.
I know that most will tell you not to do balloon releases because of environmental issues but research seems to support the fact that latex balloons are bio-degradable (http://www.theballooncouncil.org/myths-facts.html ) but the ribbons and items attached to the balloons are not bio-degradable. You decide what is best for you and your event.

Weights
You can use the typical foil wrapped weights available at many party or dollar stores. Most are light weight and will work fine for a small balloon bouquet of about 5 - 11" helium filled balloons. If balloons will be outside consider the wind factor when choosing your weights.
Heavy duty weights suitable for large balloon bouquets can be easily made yourself with a plastic ziplock bag filled with sand or pea gravel. Tie your balloon ribbons around the center of your rather unattractive weight, then drop your weighted plastic bag and balloons, into a gift bag that coordinates with your décor or theme. Complete it with a plume of tissue and/or cello coming out the top for a stunningly, sturdy balloon weight.
Just a note about this balloon weight, I know it is seriously ugly but it is the most amazing weight for large bouquets placed on a floor or outdoor bouquets where wind can be a difficult factor to content with. It is a large nut welded to a 4 pound piece of solid round metal that was spray painted black and as you can see this weight is well used. The weight slips into a gift bag, can be wrapped in tissue or hidden in some other fashion. Simply tie all your ribbon ends through the nut and they WILL stay put!

Helium Filled Balloons for Table Bouquets
When using balloons as centerpieces, place one balloon bouquet on each table. Typical recommendations are to use three latex balloons, if blown up to full size, or two foil balloons if your tables and room are smaller. For larger guest tables in larger rooms you can easily go as high as seven balloons per bouquet.  If you are using long banquet tables, you can place one in the center and one close to each end. More than that begins to look cluttered.

Fill all balloons to the same size and keep the center balloon in your odd numbered arrangements slightly higher than the others. Always leave enough ribbon to allow a curl to trail from the base of the floating balloon for a simple professional decorator touch. Curl the end hanging from your balloon with the blunt edge of your scissors and trim to desired length.

The base of the lowest balloon should be at least 26" from the base of the weight. This allows guests to see each other when seated creating a better conversation space. Layer the other balloon(s) above this so that they are tiered up. The layers can be slightly overlapping.  Make sure the bouquets are the same heights through out the room for uniformity.

Create a tighter cluster by tying the ribbon close the base of your lowest balloons.

Helium Filled Balloons for Floor Bouquets
Single bouquets can be placed in corners, or one on each side of entrances and exits. Make sure the bouquets are the same heights through out the room for uniformity.  A minimum of five latex balloons per floor decoration and a minimum of three foils are recommended. Depending upon the amount of floor space you have to work with floor bouquets can be much larger than the basic recommendation.

For each arrangement you will need a weight that is heavy enough to support all the balloons and ribbons. Be sure it is sturdy enough that is not easily  knocked over. Start with your top, or highest balloon first, and layer down to be sure you get the right height and space for all your balloons. Varied ribbon lengths are most appealing
             
Groups of bouquets look nice if you want to draw attention to, or define a certain area, such as placing them behind the cake table, behind the banquet table, or behind the band stand. placing large clusters around the dance floor or along each side of an isle. The center one should float slightly taller than the ones on either side. For an nice look, tie some lightweight tulle or garland on the balloon stems so that it swags between them, or swag it from group to group to further define an area.

Decorating with Balloons - Tips from the Pro's
  • Odd numbers in arrangements look better in balloon bouquets.
  • 3/16" curling ribbon is the best ribbon for balloon's.
  • Varied ribbon lengths are most appealing in balloon arrangements.
  • If using large foil or shaped balloons two can often be enough for a table decoration.
  • Combinations of Mylar (foil) and latex balloons look good together.
  • Bouquets of 3 Mylar and 5 latex are recommended for a nice full arrangement.
  • Mylar or foil balloons are best for outside events.
  • Order enough balloons well in advance for large decorating projects.
  • Decorate a wall with balloons using double sided tape or masking tape.
  • Use fishing line or curling ribbon to create balloon garlands.
  • Use air filled balloons for balloon drops.
  • Latex balloons should have a gentle pear shape when correctly filled.
  • Latex balloons need to be filled to the recommended size to get the maximum float time and minimize bursts.
  • Latex balloons are made from rubber sap and 100% bio degradable.
  • If doing a balloon release simply tie a knot in the end of the balloon and use bio degradable string.
  • Sketch out your balloon idea's on paper first to save time and money the day of event.
  • You don't have to blow your balloons up all the way. Leave them small use in arrangements.
  • Use sophisticated colors that match your linens to easily fend off the birthday party look.
  • Swag some lightweight tulle or garland to the stems of the balloons.
  • Set a chair 11" away from the wall (or however large your balloon should be) and inflate in the gap between wall and chair back to get the same size balloon each time.
  • Use the blunt edge of a butter knife to curl ribbon.
  • Put a penny or other small weight inside an air filled balloon (before blowing it up) to help it stay put.
Whew...who knew there was so much to say about balloon bouquets!

 Resources:
Do a general search for ......balloon bouquet images... for lots of inspiration pictures

Saturday, February 16, 2013

PAMPER ME BABY SHOWER FAVORS

Are you planning a Spa Themed Baby Shower.  Pamper mommy and guests with a delightful shower favor of fragranced bath salts.  So easy to make!

Recipe:

      2 cups  Epsom salts
      1 teaspoon  liquid glycerin
      1/2  teaspoon  fragrance oil or essential oil.
      1 drop food color (optional)

Put all your ingredients in a zip lock bag.  Gently roll ingredients around until well blended.

Packaging:

      1 clear cello favor bag  3-1/2" x 2-1/4" x 9-3/4"
      1 yard of ribbon (you choose there are just so many pretty ones!)

Put 1 cup of your now delightfully smelly bath salts into the cello bag. Tie a simple shoelace style bow close to the bath salts and fluff out your plume of cello at the top. 

I know...it looks extravagant, but you made it for so little!            Enjoy ~ Sandra